threadWEAR 301
How to Sew an Invisible Zipper in 6 Easy Steps

Anyone can sew regular zippers.
However, when it comes to invisible zippers, there's a lot more attention to detail required to get it right.
If you're not careful, your invisible zipper, which is supposed to add a touch of class and elegance to your garments, will have the opposite effect and make your clothes look crude and homemade instead.
That's why in this article, we'll show you the six steps to sew perfect invisible zippers every time. So you can be proud of your work, wow your friends, and wear them wherever you go.
Let's dive in!
How to Sew an Invisible Zipper [Simple Tutorial]
Step #1: Gather Tools
To sew an invisible zipper, you'll need:
- An invisible zipper
- An invisible zipper presser foot
- Interfacing
- Fusible web tape
- Ruler
- Chalk
- Pins
- Tailor's ham
If you don't have an invisible zipper presser foot, you can also use generic plastic zipper roller feet or a regular zipper foot that allows you to slide it from side to side.
Step #2: Preparation
Before sewing, you'll want to stabilize the seams, add fusible web tape to where your zipper will go, mark the seamlines, and press open your zipper coils.
- To stabilize the seams, add 1" wide interfacing to your fabric on the length of the zipper opening. This should be on the wrong side of your fabric. Press the interfacing to set it in place.

- Add a strip of fusible web tape along the seam allowance on the right side of the fabric. You'll paste your zipper here to hold it down before sewing it in place.

- With your ruler and chalk, mark a seamline ⅝" along the edge of the fabric on the right side of the fabric. Also, mark a horizontal line ¾" from the top of the garment.

- Take your invisible zipper and press the coils open. Don't press for too long since this can melt the zipper.

Step #3: Sew First Side
Choose any side you want to start with, and follow these steps:
1. Place the front side of the zipper on the right side of the fabric, making sure the zipper coils are along the ⅝" marked seam.
The zipper tape should lie along the garment edge, where the fusible tape can hold it in place.
The top zipper stopper should be on the horizontal marking, ¾" away from the top of the garment.
2. Press the zipper tape to fuse it in place.

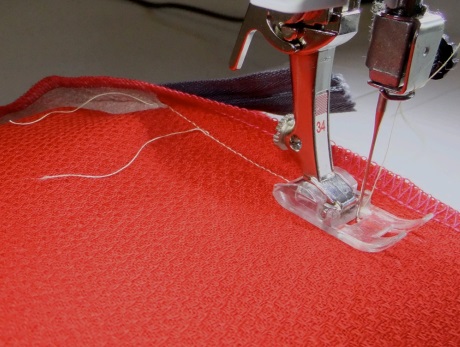
3. Using an invisible zipper foot, place the groove over the zipper coils and sew as close to the coils as possible.

4. Sew from the top of the zipper until you reach your desired zipper length (or until you reach the bottom stopper of your zipper)

Step #4: Sew Other Side
Once your first side is sewn, place your fabric on a flat surface, and follow these steps:
1. Open your zipper and flip the unsewn side so that the front side is facing up

2. Place the corresponding garment on top of the unsewn zipper, with the right side of the garment facing the front of the zipper.
3. Make sure the zipper stop aligns with the horizontal line ¾" away from the top of the garment.
4. Press the zipper tape to fuse it in place.

5. Position the invisible zipper foot over the zipper coil, and sew from the top down until you reach your desired length (or the bottom stopper)
Step #5: Sew The Bottom Area
Once both sides are sewn, the next step is to sew the bottom area of the zipper.
1. Close the zipper. Check to make sure there is no zipper tape "grin" showing on the right side of the garment.
2. Pull the bottom of the zipper out of the way.
3. Insert the needle into the previous stitching, about ½" away from the end of the stitching.

4. Use the handwheel of your machine to walk the needle for ½". Make sure the stitches are on top of the previous stitches.

5. Stitch for around 2" more, or until you are out of the way of the zipper.
6. Switch to a regular presser foot, and sew from the previous stitch down to the bottom of the garment.
Step #6: Touch Up
The finishing touches include pressing your invisible zipper, cutting excess zipper tape, and anchoring your zipper in place.
- To press your invisible zipper, place a tailor's ham inside your garment, and press gently around the invisible zipper. If you don't have a tailor's ham, you can use any firm, curved surface, like a rolled-up towel, to support the fabric and maintain the zipper's shape while pressing.

- If you have a zipper that's longer than your opening, simply cut any excess zipper with scissors.

- Bar tack the zipper tape to the seam allowance for extra stability. Make sure you don't sew into the garment while doing so, since you don't want stitches to show in front. You can also handstitch the zipper tape to the seam allowance.

Frequently Asked Questions About Sewing an Invisible Zipper (FAQs)
Do I need a special foot to sew an invisible zipper?
No. However, using an invisible zipper foot will make sewing much easier for you.
If you don't have an invisible zipper foot, you may use a standard zipper foot. Try to sew as close to the zipper teeth as possible. If necessary, push the zipper teeth out of the way as you sew to keep the seam as close to the teeth.
How do I fix puckering around an invisible zipper?
To fix puckering around invisible zippers, identify why there is puckering and adjust as needed.
Some common fixes for puckering include:
- Realigning the fabric — if your fabric is puckering due to misaligned fabric, start over and make sure that both pieces of fabric are perfectly aligned before measuring and adding markings.
- Stitching closer to the teeth — If your stitches are too far away from the teeth, this creates puckering. If you don't have an invisible zipper presser foot, try to keep your stitches as close to the teeth as possible without sewing over them.
- Pressing the zipper coils — Unopened zipper coils often lead to puckering due to stitches that are too far away from the teeth. Make sure to gently press open the coils before sewing them into the garment.
- Add interfacing — fabrics that are lightweight or stretch easily need to be stabilized before you can add an invisible zipper. One of the best ways to do this is by using interfacing on the wrong side of the fabric before sewing.
What seam allowance should I use when installing an invisible zipper?
The standard seam allowance for invisible zippers is ⅝".
Check your pattern to see if it calls for a different seam allowance.
How to install an invisible zipper head back on?
Invisible zipper heads should have two channels at the top that merge into one channel at the bottom.
To place a zipper head into the zipper teeth:
- Carefully slide one side of the zipper teeth into one of the top channels, stopping when you reach the middle.
- Slide the other line of zipper teeth into the other channel, aligning it with the other side of the zipper teeth in the middle.
- Flip so that the zipper tape is facing downwards, hold the zipper head, and pull it downwards to start closing the zipper teeth together.
What is the difference between a hidden zipper and an invisible zipper?
There's no difference between hidden zippers and invisible zippers.
These two, along with "concealed zippers," refer to the same thing — a zipper that hides its teeth beneath the fabric.
Ready to Take Your Clothes to the Next Level?
Invisible zippers are one of the easiest ways to give your clothes a professional-looking finish.
So go ahead and follow these 6 simple steps, and you'll sew perfect invisible zippers every time.
But don't stop there!
Keep practicing, keep learning new techniques, and keep working on sewing clothes that you can be proud of.
If you'd like to learn five other techniques to take your clothes from homemade to designer-finished, then check out our free training below!
 Gallery
 Blog
Blog Events
 Notions & Tools
 Tutorials
 Craftsy
