threadWEAR 301
How to Sew a Skirt in 9 Easy Steps
Imagine being able to sew your own skirt.
You can create any design your heart wants, and it'll not only look great, but it'll also fit you perfectly.
Plus, you can finally say goodbye to all those boring, expensive, or ill-fitted store-bought skirts for good.
Well... the good news is that you don't have to imagine!
Sewing a skirt is a lot easier than you might realize. It's so simple, that sewing a skirt is arguably the best first project a beginner can take on.
Plus, skirt patterns have lots of room for you to customize your design and create something uniquely for you.
But how exactly do you sew a skirt?
Let's go over the nine simple steps to go from plain fabric to a lovely skirt.
How to Sew a Skirt
Step 1: Gather Your Materials
For the most part, all you need are your basic sewing supplies:
- Sewing machine
- Measuring tape
- Ruler
- Fabric scissors
- Pins
- Seam ripper
- Iron
- Fabric
- Pattern
- Marking tool
- Elastic waistband (depending on your pattern)
You may choose any fabric that you want. However, here are a few great options:
- Woven Cotton - we usually recommend using woven cotton for beginners. It's easy to tell the right side from the wrong side, and you don't have to worry about the fabric stretching or slipping as you sew.
- Linen Cotton Blend - linen gives skirts a classier flowing look. However, linen on its own can be slippery, especially for beginner sewists. When you use a linen cotton blend, however, you can get the same classy look without worrying about the fabric slipping
- Lightweight Denim - denim is another easy-to-work-with fabric that looks great on casual skirts. You can use chambray for a lighter, flowy feel, or lightweight denim for a more traditional denim look. However, you may want to avoid thick denim, as it can be tricky for beginners to handle the thickness.
Step 2: Take Your Measurements
To sew a skirt, you'll generally want three measurements:
- Your waistline
- Your hip, and
- Your desired length
Your waistline measurement should be at the smallest part of your waist. Wrap your tape measure around the waist, keeping it parallel to the floor.

Meanwhile, your hip measurement should be at the widest part of your hip, known as the full hip. From the side of the body, find and measure the fullest part of the hips, keeping the tape measure parallel to the floor. For many skirts patterns, you'll also want to measure the distance between the full hip and the waist.

Finally, you're free to decide the length of your skirt. Just measure your legs and decide if you want your skirt to reach right below your knees (traditional length), just above the ankles (long skirts), or above your knees (short skirts).
Having these three measurements ensures you'll get a skirt that fits you just right.
If you'd like to learn more about how to take your full body measurements, check out our full guide here.
Step 3: Choosing/Creating a Pattern
For beginners, we generally recommend choosing a basic pattern with minimal details. This way, you can practice sewing a skirt without getting bogged down by technical skills.
Some of the most simple yet pretty patterns we recommend for beginners include:
Or you could also create a basic rectangular pattern.
The most basic skirt pattern uses two identical pieces of fabric, the front and back. To draft a basic rectangular skirt pattern, cut two pieces using your desired skirt length and a width equal to ½ of your hip measurement plus 1–2 inches of ease. Remember to add seam allowances around all edges.
Tip: before cutting your fabric, test your pattern on scrap material to see if it fits first. This will save you from making a lot of adjustments once you're done.
Step 4: Cutting The Fabric
If you're using a pattern, make sure to adjust the measurements to your size before cutting. We have a guide on how to fit patterns here.
If you're making your own pattern, don't forget to add seam allowance. ⅝" - 1 ½" is generally a good range for seam allowances. You may want to leave more seam allowance at the bottom of your pattern since most hemline finishes will have you folding the fabric.
Before cutting, make sure to lay your fabric out on a flat surface. Then focus on creating a smooth, straight cut to reduce the number of loose ends. You can do this by holding the fabric down with one hand, and cutting in long, even strokes. For more stability, you can even keep the bottom of the scissors pressed against the table.
Depending on the pattern you choose, make sure that you know where the right and wrong sides of the skirts should be, and cut accordingly.
Step 5: Sew the Side Seams
Again, most skirts will have two pieces of fabric, the front and the back. At its core, all you need to do to sew a skirt is to sew these two pieces together, and you'll have a skirt.
Of course, there are plenty of variations of how to do this depending on your pattern. But let's take a look at the most basic way of doing this.
You'll want to first start by aligning your two pieces of fabric and using pins to hold them together. As much as possible, you'll want to place the pins perpendicular to the seam, so that you can sew over them and remove them easily when you're done.
Once the pins are in place, you can begin sewing.
You can start either at the top of the skirt or at the bottom. If you're afraid of the thread unraveling later on, start with a small backstitch before sewing down the line, and end with a backstitch as well.
Do this for both sides, and all your skirt will need are a few more finishing touches.
Step 6: Sew Darts
In many skirt patterns, you'll need to sew darts to give a better shape to your finished product. Darts are triangular folds sewn into the fabric to shape it around the body.
If your pattern has darts, you typically mark these on the wrong side of your fabric. Then, fold the dart at the center, press with your iron, and then sew together starting at the outer edge and ending at the point.
You'll then want to tie your thread tail and finish by pressing with your iron. This should leave you with nice, clean darts for your skirt.
If you've never tried sewing darts before, you can use pins to hold the dart in place while you sew. Make sure to keep your pins perpendicular to the stitch, so you can sew over them and remove them once you're finished.
You can even hand-baste the stitch first. This way, you can be sure your darts won't slip as you sew with your machine.
Step 7: Finish the Hemline
One of the most popular ways to finish your skirt's hemline (the bottom of the skirt) is by creating a double-fold hem. To do this, you'll need to:
- Fold the raw edge up once (about ¼"–½")
- Press with your iron
- Fold again, and then
- Stitch close to the inner folded edge
This will give your skirt a sturdy but clean finish.
Step 8: Add a Waistband
Most skirts use either an elastic or a fitted waistband to finish the top of the skirt.
Before you begin, it's useful to clean up the raw edges of the top by using a serger or a zigzag stitch. This makes sewing in the waistband easier and cleaner.
There are several ways you can add an elastic waistband. Here's one of the most simple ways to do it:
- Fold the top edge down about ¼"
- Press with your iron
- Fold again wide enough to fit your elastic band and a little extra wiggle room
- Press the fold
- Sew close to the bottom folded edge of the casing, and leave an opening of about 1-2" to insert the elastic
- Attach a safety pin to one end of the elastic and thread it through the casing
- Once the ends of the band meet, sew them together using a zigzag stitch
- Sew the rest of the folded edge and seal the elastic in place
Step 9: Clean Up and Adjust to Fit
If you've tested your pattern on scrap fabric first, your skirt should come out almost perfect by now. All you need to do is clean up loose threads and give your skirt a clean look.
If you find some areas too tight or too loose, remove the threads and adjust as needed.
Easy Skirt Patterns to Try

The eSkirt is one of our favorite patterns for beginners.
Not only is it simple to sew, but the finished product also looks great.
The eSkirt will also help you familiarize yourself with the fundamentals of sewing skirts, particularly sewing folds.
You can check out the eSkirt pattern here.
Six Sense has a few more details than the eSkirt, but it's still a very simple pattern to sew.
Aside from using an elastic waistband, this pattern will also teach you how to sew pockets into skirts.
If you'd like to sew this yourself, grab the pattern here.

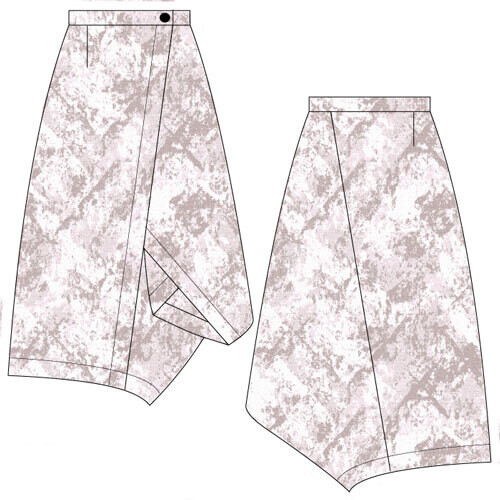
Not all skirts have to be symmetrical. With the 8th Avenue, you'll learn how to sew stylish cuts and folds into your skirts to make them pop.
You can also use different fabrics with this skirt to make it even more unique.
So if you'd like to try your hand with this design, grab the 8th Avenue pattern here.
Customizing Your Skirt
Once you've sewn your first skirt, you don't need to stop there. There are many ways you can customize your skirt to make it look better or make it more suited for you.
Here are some ways you can do this:
- Add Pockets - One of the most frustrating things about buying skirts and dresses is that so few of them have pockets. Well, now that you know how to sew, why not add pockets yourself? You can learn more about sewing pockets in our free pocket template here.
- Use a High-Low Hem - Having a shorter front and a longer back is a fashionable way to sew skirts. Instead of cutting a straight bottom in your pattern, use a curved ruler to draw a smooth and gradual curve connecting the front and back hem on the side seams.
- Add Details - Use fancy buttons, add a ribbon to the waistband, sew in details and decorations, use different colored fabrics… there are countless ways to add details to make your skirt uniquely yours. So don't be afraid to play around to create something special.
Bonus Step: Join a Sewing Program!
Sewing a skirt is relatively easy.
Just follow the steps above, and you should walk away with a brand-new skirt made completely by you.
But if you want to take your skills to the next level…
If you want to learn how to handle more complex patterns and add more intricate details…
If you want to do away with a "homemade" finish to your projects…
Or, if you just want to be confident that you can turn any pattern into a beautiful reality, then why not join our sewing program that'll teach you all of this and more?
To learn more, check out our Sew Confident Workshop here!
 Gallery
 Blog
Blog Events
 Notions & Tools
 Tutorials
 Craftsy
