threadWEAR 301
Sewing for Beginners: A Complete Guide to Get Started

Sewing can feel overwhelming at first.
Not only do you have to figure out how the machine works, but you have to keep track of dozens of tools and learn a hundred new terms.
Add patterns that look more like rocket-ship blueprints and it's enough to make anyone hesitate.
The Sewing Workshop is here to demystify some of the hesitancy of sewing for you. We've created a quick beginner's guide to sewing where we will give you:
- Step-by-step instructions on how to start
- Five easy projects beginners can take on, and
- Five tips to make your journey much simpler
- …and more!
Step-by-Step Instructions to Get Started Sewing As a Complete Beginner
Step 1: Gather Your Materials
All you truly need to start sewing is a needle, thread, and some fabric.
However, you should add a few more items to the list to create actual clothes you want to wear.
Here's what we would recommend:
- A sewing machine - of course.
- Presser feet - attachments for your sewing machine that hold fabric down while stitching (if you can get a few of these, that'd be great)
- Fabric - for beginners, cotton is a great fabric to start with. From there, there are many different fabrics to choose from
- Measuring tape or a ruler
- Fabric Scissors
- Pins - for holding fabric together while you stitch
- A seam ripper - a tool for removing stitches. This will come in super handy when you make a mistake.
- An iron - for making your seams flat and giving your project a polished look
- An ironing board
- Large area for cutting - It's always great to consider investing in a cutting table
- A pattern - following a pattern makes sewing so much easier and helps gain confidence in general techniques and construction
- Marking tool - such as tracing paper or a tracing wheel
Optionally, you can also use a serger or pinking sheers to give your garment's edges a smooth or more professional finish. But that's up to you.
With these items, you're all set to begin.
Step 2: Learn How Your Sewing Machine Works
Different sewing machines will have different instructions on how to use them.
That's why you'll want to grab your user's manual and familiarize yourself with your specific sewing machine (it will be your best friend in your sewing journey).
Some things you'll want to learn right away:
- How to thread your machine
- Winding and inserting the bobbin or spool (the round object that you wrap thread around)
- Adjusting stitch settings (how to set different lengths and widths)
- Inserting your presser foot
Step 3: Practice The Fundamentals
There are several fundamental skills you should practice before you start working on a project.
These include:
1. Straight Lines
Sewing straight is one of the most critical skills for a new sewist.
In fact, before you even try to sew a project, it's a good idea to practice your straight lines first.
It might sound simple, but many beginners struggle with this at first.
For sewing straight lines, aim for accuracy within 5/8th inch as much as possible. Once you can do that, your projects will start looking more professional.
2. Measurements and Cuts
If your measurements are off, you won't be able to choose patterns that fit correctly and could select the wrong fabric amount.
Similarly, if your cuts are uneven, your clothes will have an untidy, "home-sewn" finished look.
That's why you should always ensure that you have enough fabric when measuring and cutting.
Lay your pattern pieces out on the fabric and see if there's enough. Remember, you should never cut your fabric until you're absolutely certain you have enough.
You'll also want to learn about the right and wrong sides of the fabric.
The "right" side of the fabric is the side that should be facing outwards of your garment (what people see when you wear it).
The right side should look better than the wrong side, so look for more vibrant colors and a smoother finish. Meanwhile, the "wrong" side of the fabric is what faces your body when you wear it.
Most fabrics have a right side and a wrong side, so look for that. However, on some fabrics, it's harder to tell what is the right side and what is the wrong side.
3. Pivoting and Sewing Curves
Pivoting is a technique that allows you to sew corners.
Here's a quick how-to:
- Sew a straight line towards the corner
- Use the hand wheel on your sewing machine to keep the needle down on the fabric (you want to do this since the thread can unravel if it isn't held down by the needle)
- Lift your presser wheel
- Pivot the fabric at a 90-degree angle
- Start sewing!
This will create a perfect 90-degree stitch.
Aside from pivoting, you'll also want to practice sewing curves.
Use a marker and a curved ruler to draw a curved pattern, then practice sewing along that line as smoothly as possible.
There aren't really any "secrets" to sewing curves. All it takes is practice to become confident in making a perfect curve.
4. Pressing
This is when you lightly press the iron to the seams of the garment. It is a crucial step to achieve precise seams and sharp lines.
Pressing is different from regular ironing because you use this technique while you're sewing a piece of clothing. In contrast, ironing is more of a general smoothing technique you do after you've finished sewing.
Step 4: Start Your First Project
Once you grasp the fundamentals, it's time for your first project.
To start with, you'll want to take on a simple project with minimal details.
You might be excited to create beautiful, flashy clothes, but we highly recommend starting with something easy for beginners.
This won't just reinforce the fundamentals in your mind and hands–it'll give you a quick win that'll motivate you to try other pieces.
Not sure which project to take on?
Here are some of the easiest patterns you can choose from:
5 Easy Sewing Patterns for Beginners
1. Provence Bag
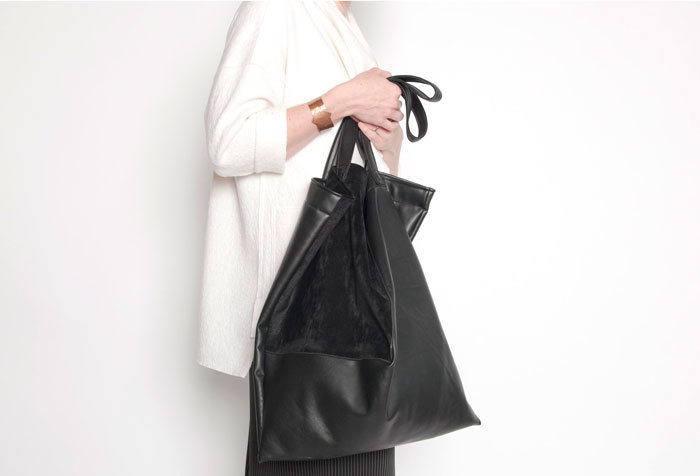
If you're new to sewing and aren't confident to take on a top or a bottom yet, a bag is a great place to start.
The measurements and cuts for this Provence bag are remarkably simple. There are also no details that you need to worry about.
Best of all?
Even though it's so easy to sew, you'll already have a stylish bag that you can pair with many different clothes.
2. Eureka Top
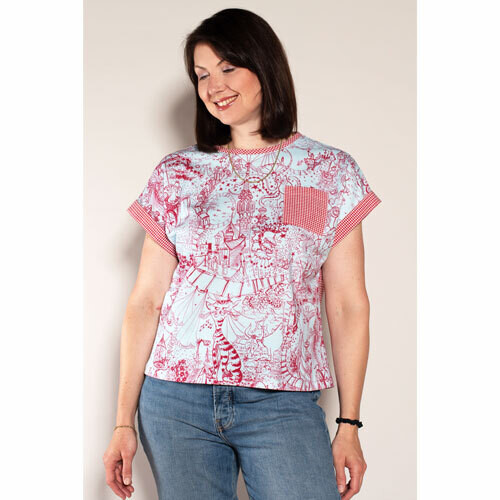
If bags aren't your thing…
Or, if you want to make something you can wear, the Eureka top is a great place to start.
The Eureka Top is one of the most straightforward shirts to sew. There are no fancy details to worry about, yet sewing it will test your fundamental sewing skills.
3. eSkirt

Another easy project you can try as a first-timer is this eSkirt.
The eSkirt has no intricate details, and everything, including the measurements, cuts, and seams, is quite simple.
Also, it looks great, wouldn't you say?
4. eDress
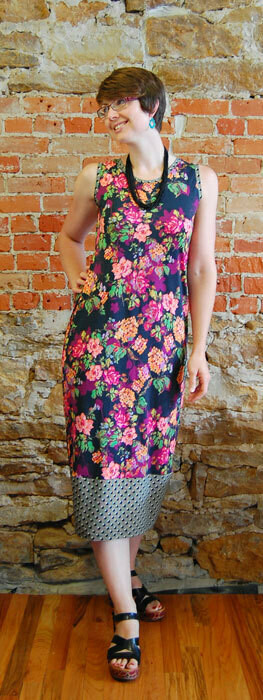
The eDress is a simple project that has little fit considerations. Once it's finished, you'll have mastered a lot of essential sewing skills.
5. Splice Top
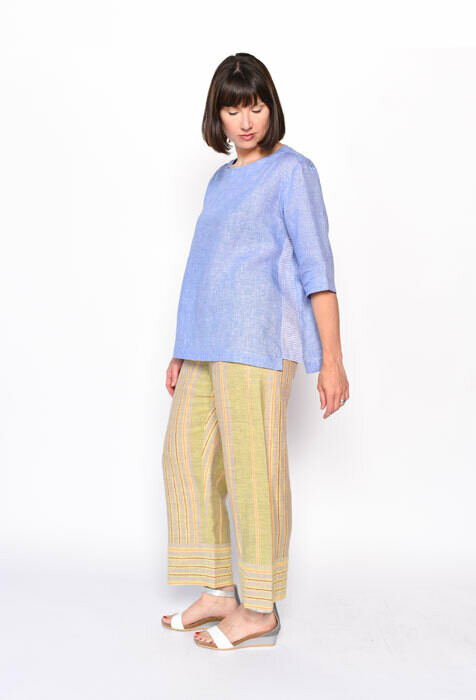
Another very simple pattern you can sew is this Splice Top.
It's not quite as basic as the Eureka Top (you'll notice a small splice running down the shirt's side), but has many friendly elements to it.
5 Helpful Sewing Tips
The easiest way to shorten your learning curve and avoid common beginner mistakes is to learn from people who have decades of experience sewing.
Here are our top tips from Sewing Workshop for getting started with sewing your own clothes:
Tip #1: Measure Yourself Very Accurately
It's critical to measure yourself first before you start working on a pattern.
Patterns come in different sizes that depend on your measurements. If you choose the wrong pattern, your piece will not fit.
So grab a tape measure and get to work.
Measure your full bust for tops and your waist for bottoms to determine the pattern size you should use.
Tip #2: Read the Guidesheet Carefully
Before you get to work, make sure to go over the guide sheet very carefully.
🪡Make sure you understand the fabric layout.
🪡Make sure you understand the techniques used for the pattern.
🪡Make sure you understand all the terminology in the guide sheet.
By doing this, you'll drastically reduce your mistakes while sewing. You'll also minimize the chances of scraping a whole piece of fabric due to an error.
So don't rush. Read the guide sheet and look up any techniques or terminology you don't understand.
Tip #3: Practice Techniques Before Trying Them
Did you come across a technique you don't know how to do?
Or maybe you aren't confident yet with sewing a button, doing a dart, or grading?
Whatever the case, if you encounter something you're unfamiliar with, grab a piece of scrap fabric and practice first.
There's nothing worse than being 75% done with a piece and making an error with a specific detail that ruins the whole project.
So, create samples.
You can also keep these examples in a binder. If you forget how they're done, you can check out the sample you created.
Tip #4: Pick a Simple Pattern
The 5 patterns we've listed above are all perfect for beginners.
But if you don't like any of them, try a simple pattern for your first project.
Find something that has as few details as possible. This way, you can master the fundamentals before working on tricky stuff. It's also the perfect way to learn the terminology of sewing.
Finally, it's a great way to build confidence.
There's nothing like the feeling of wearing something that you sewed yourself for the first time. And it'll be a great motivator to keep on going.
If you choose a complicated pattern, you may end up frustrated instead.
Tip #5: Choose a Woven Fabric
Finally, it's best for beginners to start with a woven fabric such as cotton.
With cotton, you won't have any problems finding the right side. You also won't have to worry about any stretch in the fabric.
This makes it ideal for beginners.
Remember, with so many new things to learn, you don't want a fabric that is difficult to work with.
I recommend using cotton while you focus on learning the fundamentals.
Hand Sewing vs. Machine Sewing
One of the biggest decisions beginners have to make right off the bat is whether they are going to sew by hand with a machine.
Both have pros and cons that you need to consider–here's our take:
Machine Sewing
Use a machine if you plan to mostly sew clothes.
Sewing machines have made sewists' lives much easier by handling many of the tedious tasks that come with sewing clothes–and that allows you to focus on the creative aspects of your projects.
They're also better at maintaining even stitches and keeping seams neat and tidy.
Hand Sewing
Hand sewing is useful for fine details, such as attaching buttons or basting.
While it's important to know how to sew by hand, you'll do most of your stitching on a machine.
Still, honing your hand-sewing skills can make a real difference when you're adding intricate details that help your garments stand out.
Ready to Start Sewing?
Learning how to sew is one of the most rewarding skills you can pick up.
So, whether you just want to try something new or have wanted to sew for a long time but have always put it off, don't wait to start.
Follow the steps in this guide, choose a simple pattern, and keep these tips in mind. Before long, you'll be creating beautiful, confidence-boosting garments.
And if you're serious about mastering this skill, check out our Sew Confident Program here!